
Oropharyngeal Airways (OPA): A Core FREC 3 Airway Skill Explained Properly
Clinical Information Notice
The information in this article reflects current UK pre-hospital care principles and is accurate to the best of our knowledge at the time of publication.
Clinical practice can vary between organisations. Learners, FREC 3 holders and healthcare professionals should always follow their local policies, procedures, scope of practice and clinical governance arrangements.
This article is intended for educational purposes only and should not replace formal training, local protocols or professional clinical judgement.
Airway management is one of the most important practical skills taught on a FREC 3 course.
It is also one of the most commonly misunderstood.
An oropharyngeal airway (OPA), often called a Guedel airway, is a simple airway adjunct placed into the mouth to prevent the tongue from collapsing backwards and obstructing airflow in a patient who cannot maintain their own airway.
That is all it does.
It does not secure the airway.
It does not prevent aspiration.
It does not replace positioning or suction.
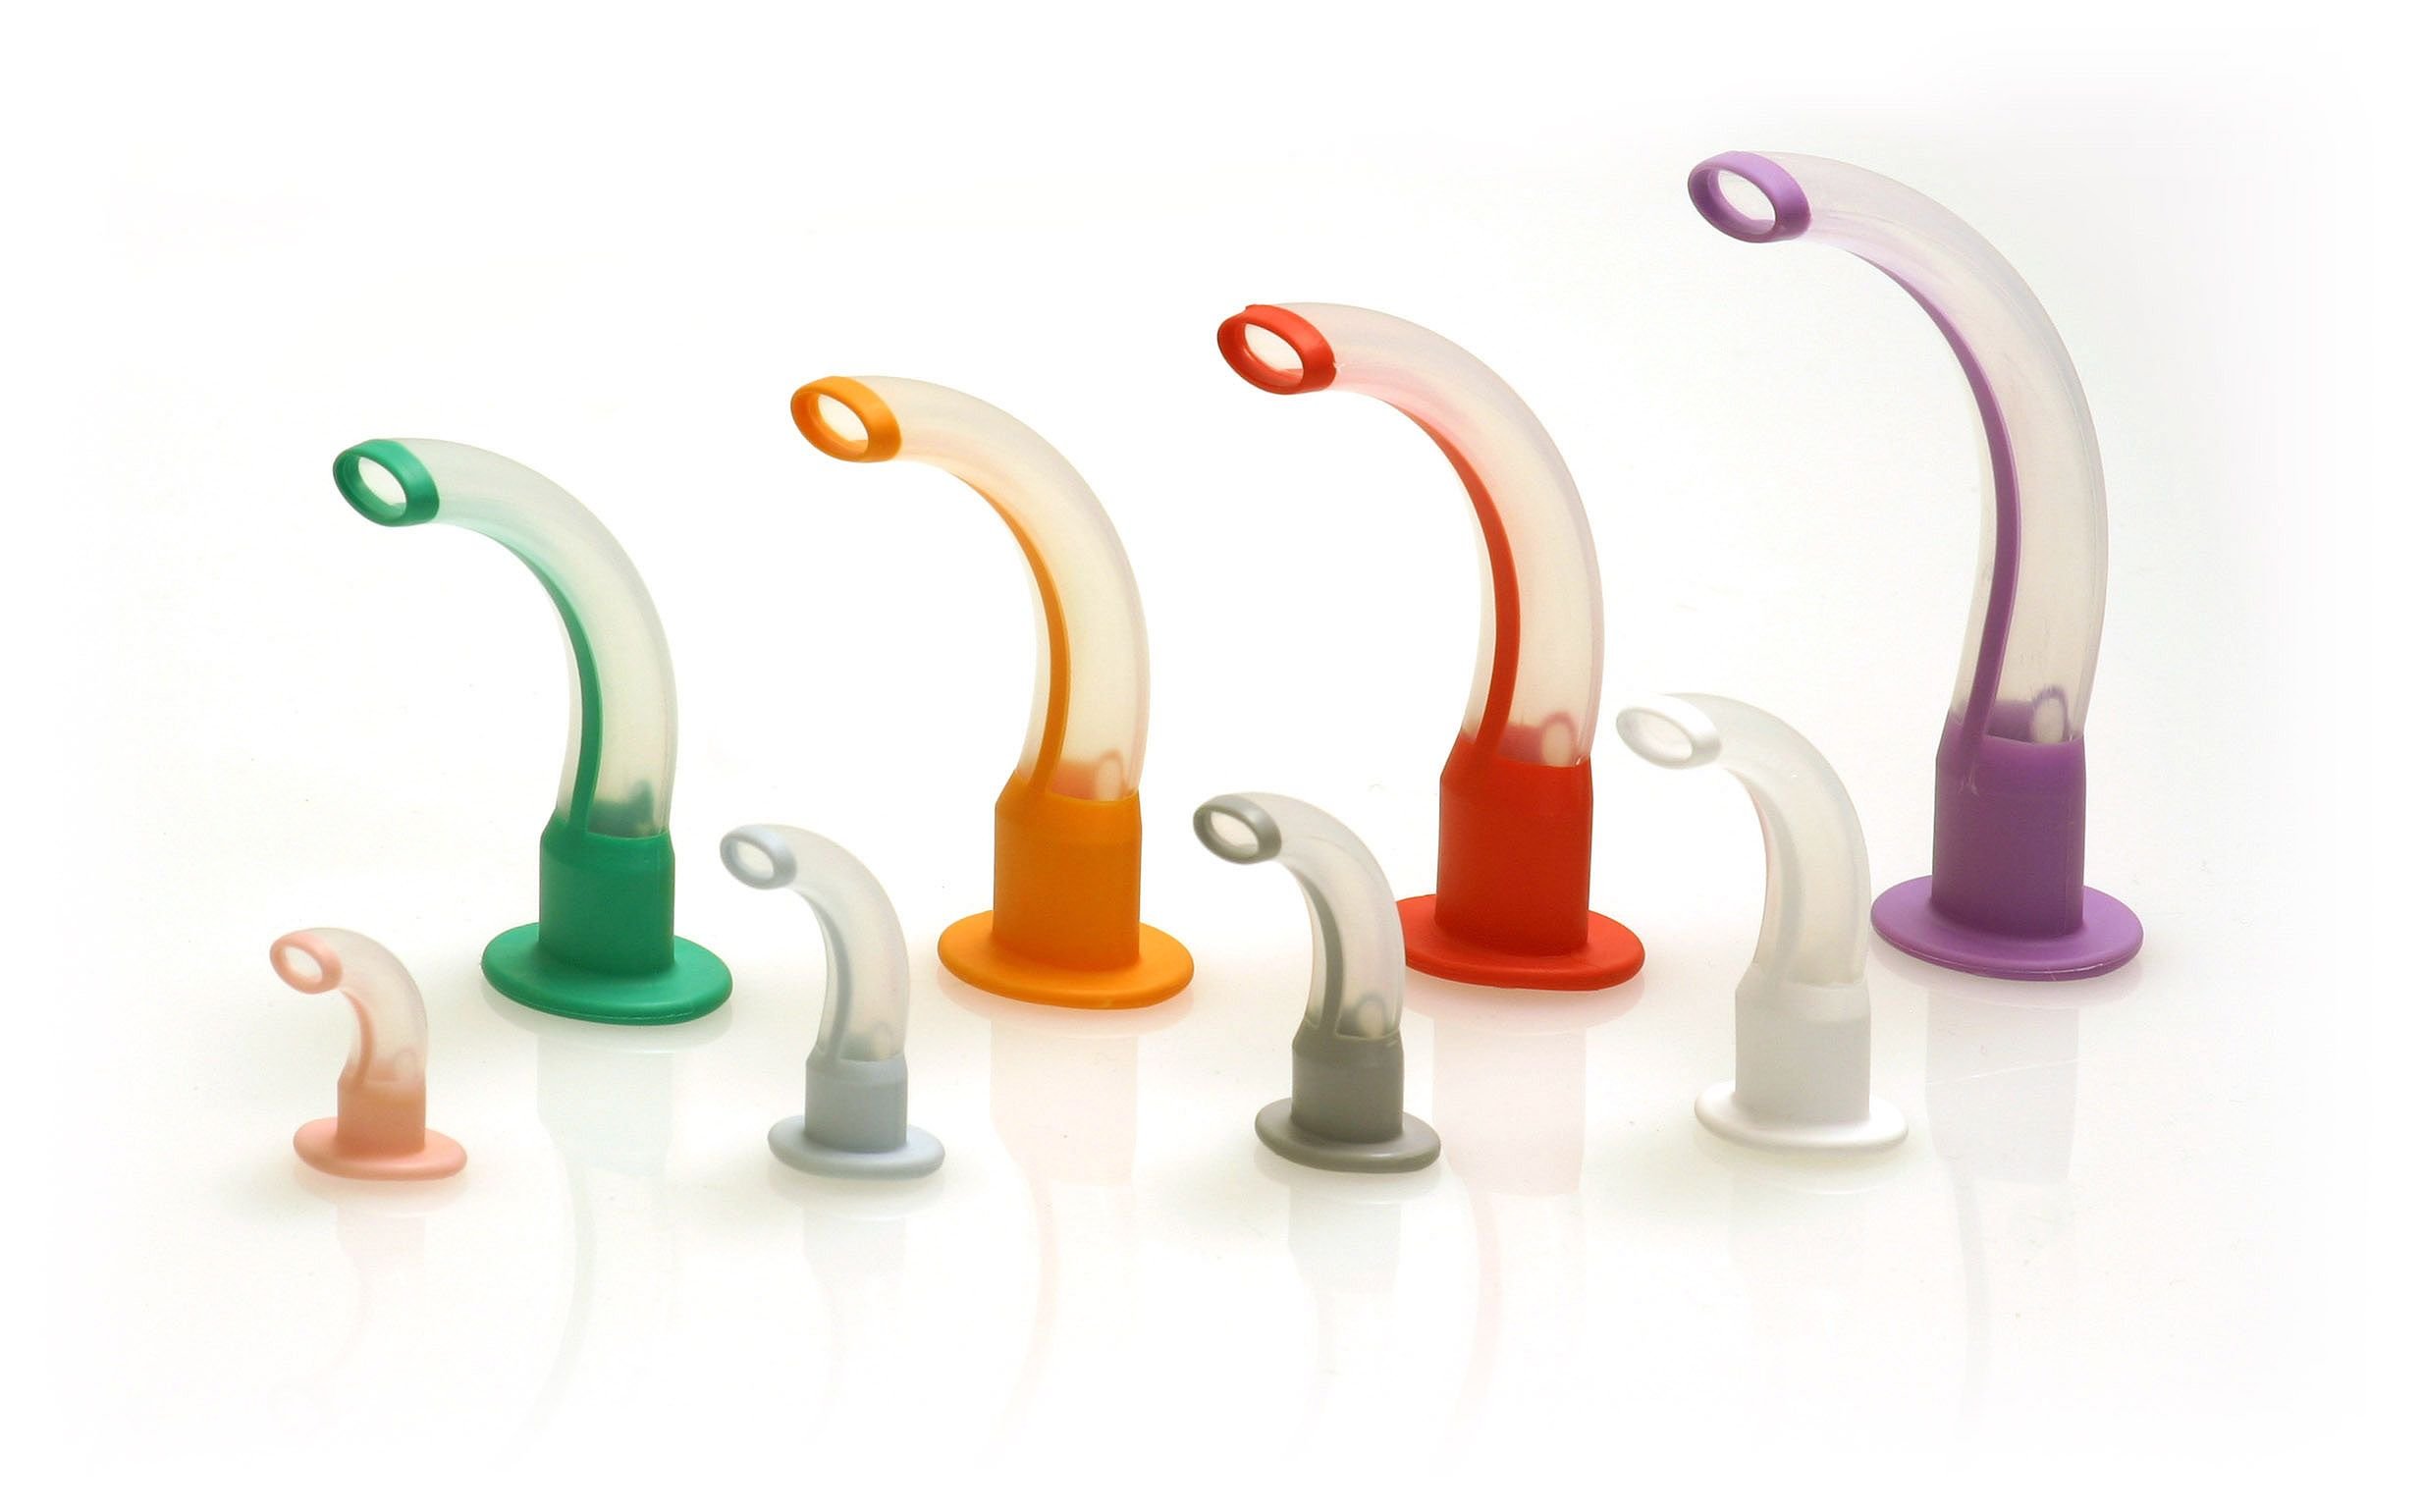
Image by Intersurgical Ltd, via Wikimedia Commons. Licensed under Creative Commons Attribution-ShareAlike 3.0.
Used correctly, it supports safe pre-hospital airway management. Used incorrectly, it can cause harm.
Another airway adjunct commonly used in pre-hospital care is the nasopharyngeal airway (NPA). Unlike an OPA, which is inserted through the mouth, an NPA is inserted through the nose and can sometimes be tolerated in patients who still have partial airway reflexes.
In this article we focus on OPAs, which form a core airway skill taught on a FREC 3 course. NPAs are covered separately.
This guide explains the anatomy, indications, contraindications and safe insertion technique for OPA use in line with UK pre-hospital practice and the principles outlined in Ambulance Care Practice (2nd ed.).
Understanding the Anatomy – Where Does an OPA Sit?
Before inserting an oropharyngeal airway, it helps to understand where it actually sits.
The upper airway is divided into three main areas:
Nasopharynx - The space behind the nose.
Oropharynx - The space behind the mouth and tongue.
Laryngopharynx - The lower part of the throat above the larynx (voice box).
Image source: Respiratory Therapy, WisTech Open. Licensed under CC BY 4.0.
Air travels:
Mouth → Oropharynx → Larynx → Trachea → Lungs
When a patient becomes unconscious, muscle tone reduces. The tongue relaxes.
If the patient is lying flat on their back - known medically as the supine position - gravity allows the tongue to fall backwards into the oropharynx.
This soft tissue collapse is one of the most common causes of airway obstruction in unconscious patients.
An OPA works by sitting in the mouth and holding the tongue forward so air can pass freely through the oropharynx.
It does not go into the lungs. It does not enter the trachea. It simply creates space for airflow.
Understanding this anatomy makes the decision to use an airway adjunct logical rather than mechanical.
Airway Management Comes Before Airway Adjuncts
On a FREC 3 course, airway care is taught as part of a structured ABCDE assessment.
Before inserting any airway adjunct, responders should attempt:
Head tilt chin lift
Jaw thrust
Postural drainage
Optimising positioning
Many airway obstructions resolve with positioning alone.
Airway adjuncts are introduced when:
Manual manoeuvres are ineffective
Airway patency cannot be maintained
Ventilation is compromised
Airway care is dynamic and requires continuous reassessment.
Case Study – Positioning First
A 57-year-old male is found collapsed on the kitchen floor. He is lying supine and only responds to painful stimulus. Loud snoring respirations can be heard.
Snoring often indicates soft tissue obstruction caused by the tongue.
A jaw thrust is performed and the obstruction immediately resolves.
However, when jaw support is released the obstruction returns.
Because manual manoeuvres cannot be maintained and airway reflexes are absent, a correctly sized OPA is inserted.
Ventilation stabilises.
Learning point
Position first. Adjunct second.
Indications for OPA Use
An OPA may be appropriate when a patient:
Has reduced consciousness
Cannot maintain their airway
Has absent or reduced airway reflexes
Has persistent obstruction despite positioning
Requires support during bag-valve-mask ventilation
Is in cardiac arrest
The key decision point is the gag reflex.
The gag reflex is a protective reflex that causes retching when the back of the throat is stimulated.
If it is present, an OPA should not be inserted.
Contraindications - When Not to Use an OPA
In medical language, a contraindication means a situation where a treatment or intervention should not be used because it could cause harm.
An OPA should not be used in patients who:
Are conscious
Are semi-conscious with intact airway reflexes
Are gagging or retching
Resist airway manipulation
If the patient gags during insertion, the airway should be removed immediately.
Forcing an OPA into a patient with intact reflexes may cause:
Vomiting
Aspiration
Laryngospasm (reflex closure of the airway)
Worsened airway compromise
The key contraindication is intact airway reflexes, not simply the presence of airway obstruction.
In some situations where an OPA is not tolerated, a nasopharyngeal airway (NPA) may be considered as an alternative airway adjunct, provided there are no contraindications to nasal insertion.
Case Study – Preserved Reflexes
A 24-year-old male with alcohol intoxication is found semi-conscious outside a nightclub. His breathing sounds partially obstructed.
You reposition him onto his side and airflow improves.
When assessing the airway he coughs and gags.
An OPA is not inserted.
Shortly afterwards the patient vomits.
Learning point
Preserved airway reflexes make OPA insertion unsafe.
Recognising Suspected Airway Obstruction
Airway obstruction may present with:
Snoring respirations - usually tongue
Gurgling sounds - fluid
Stridor (high-pitched noise) - upper airway narrowing
Reduced chest movement - chest trauma/pneumothorax
Increased work of breathing - respiratory distress
If obstruction is caused by secretions, blood or vomit, suction and or postural drainage is required before considering an airway adjunct.
Sizing the OPA Correctly
Correct sizing is essential.
Size The OPA
Measure the vertical distance between the patients incisors (the front teeth) and the angle of the jaw. In practice, some clinicians may use an alternative method, measuring from the corner of the mouth to the angle of the jaw. While this can be a useful guide, it may be less accurate in some patients, and clinical judgement should always be applied.
If it’s too large
It may press against airway structures
It can cause trauma
If it’s too small
It may push the tongue backwards
Obstruction may worsen
Incorrect sizing is one of the most common causes of OPA problems.
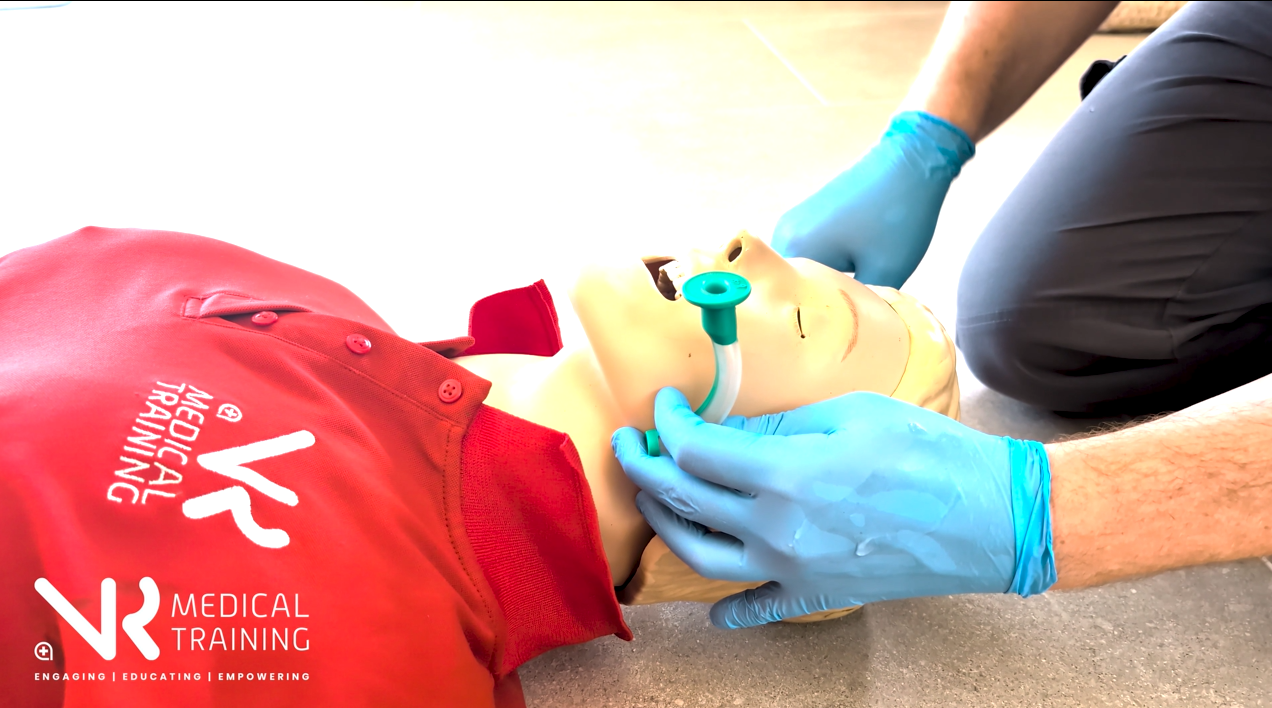
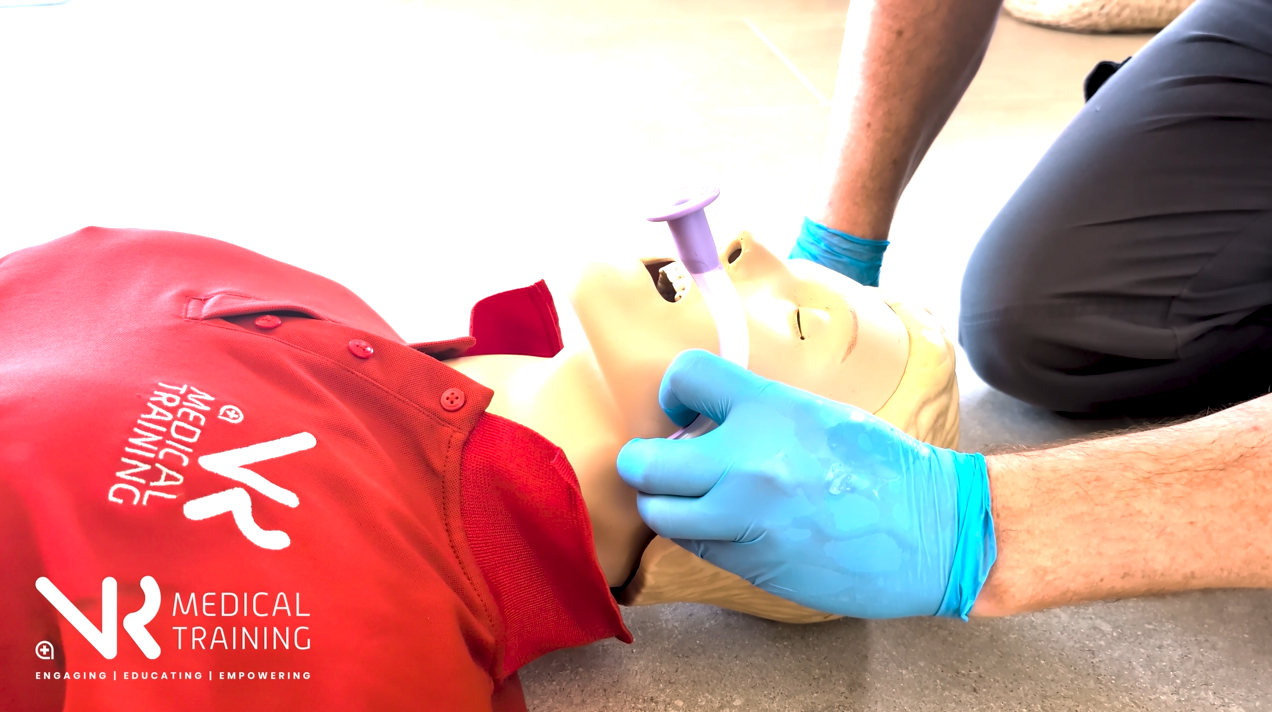
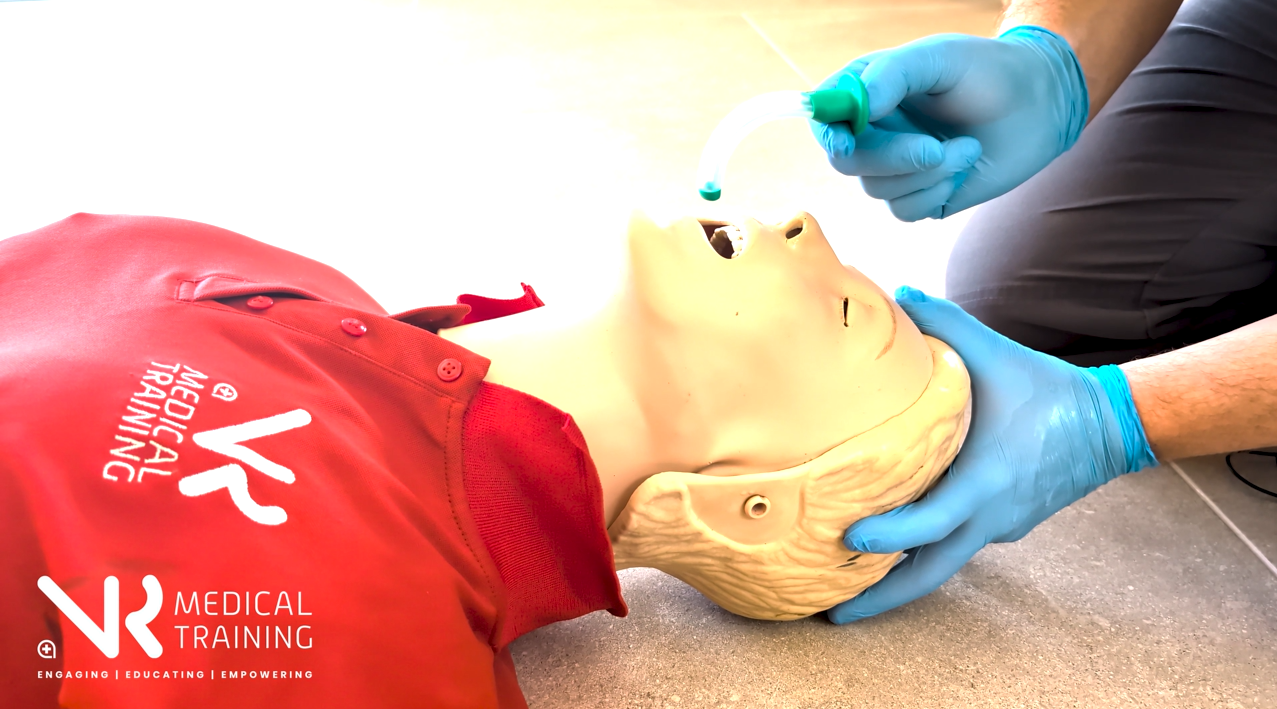
OPA Insertion Technique (Adults)
In training we often use the memory aid:
Invert – Insert – Rotate – Locate
Preparation
Apply PPE
Ensure suction is available
Clear the airway
Select correct size OPA
Optimise head position
Pre-oxygenate if ventilating
Invert
Insert the airway upside down so the curve faces the roof of the mouth.
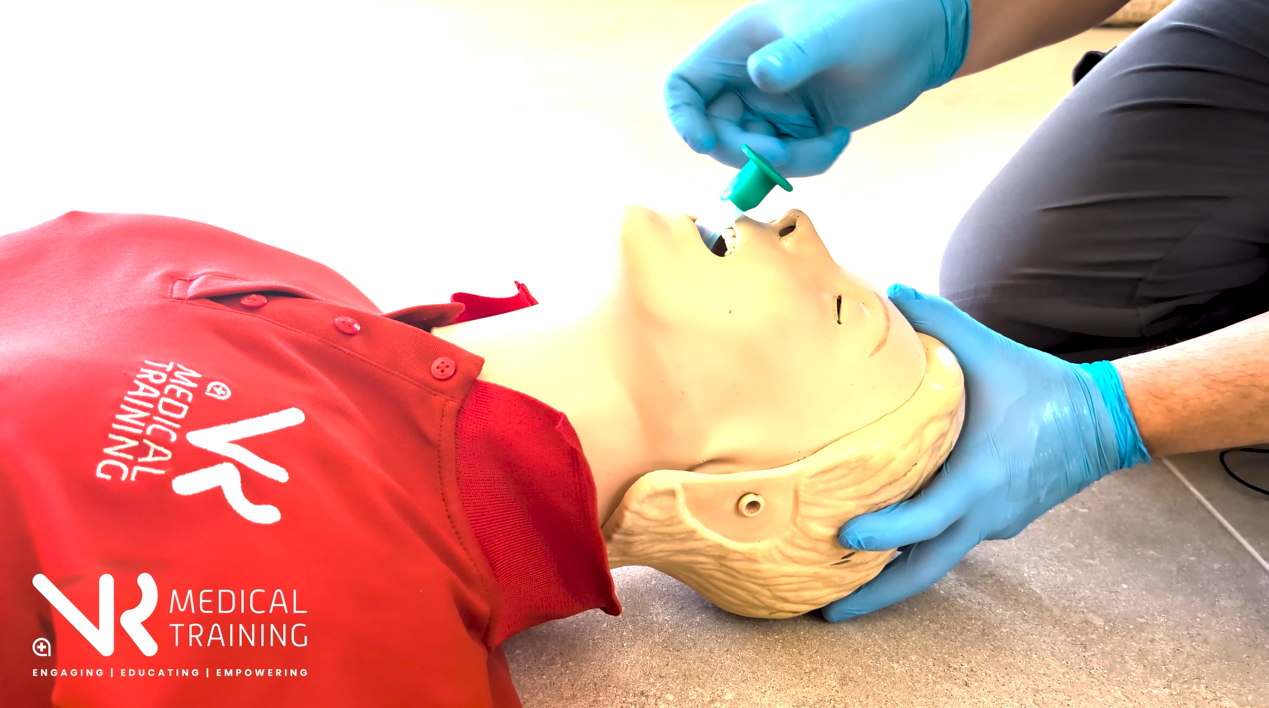
Insert
Advance gently until past the tongue.
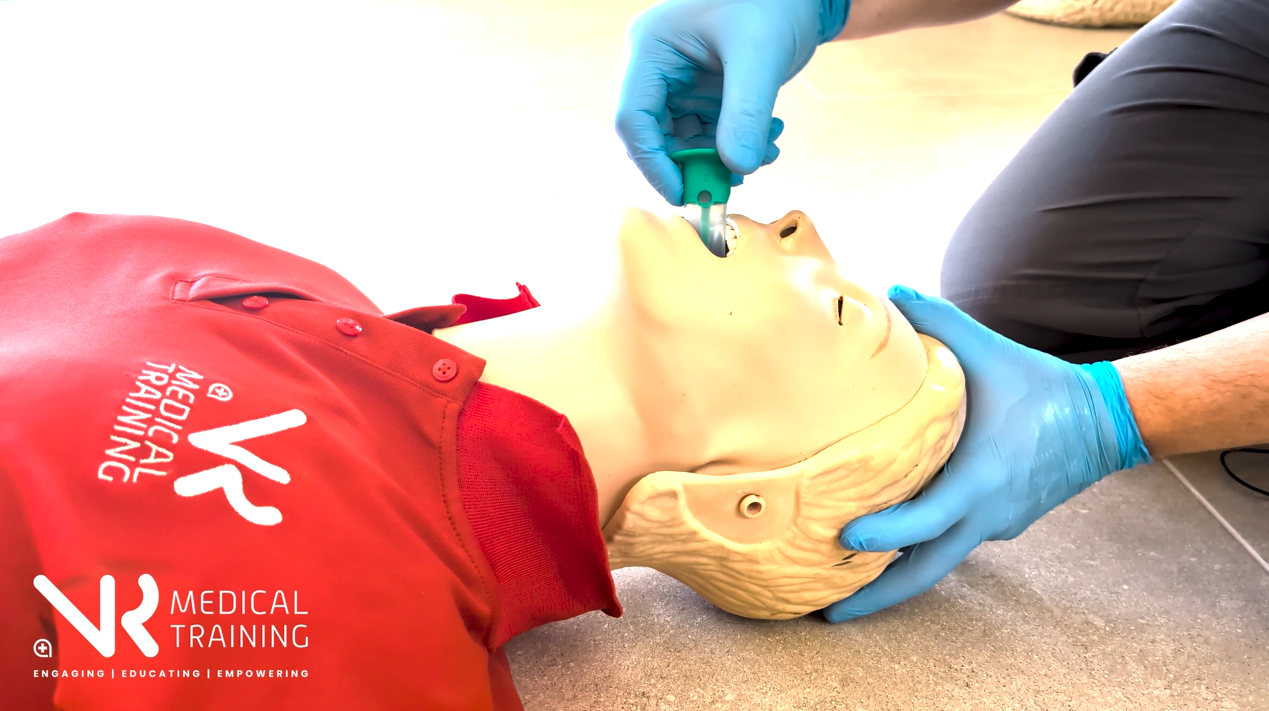
Rotate
Rotate the airway 180 degrees so it follows the natural curve of the tongue.
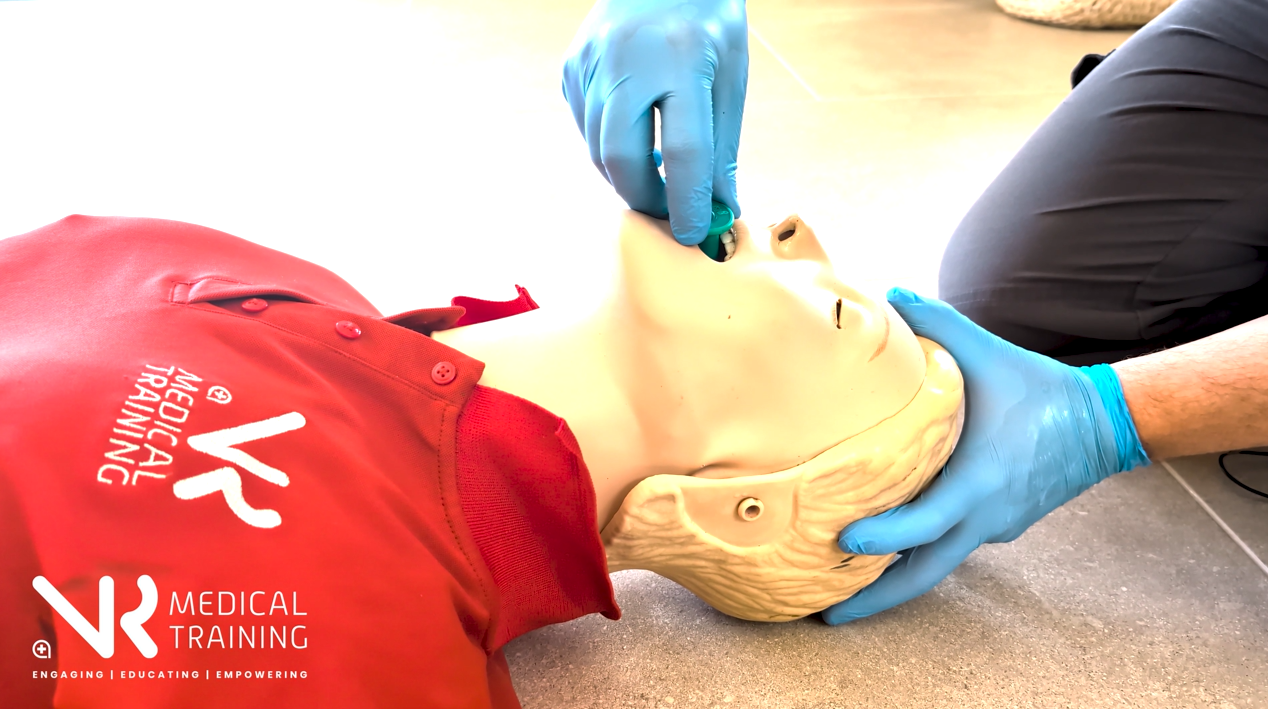
Locate
Advance until the flange rests against the lips.
Do not force the OPA.
Case Study - Clear Indication
A 72-year-old female is found unresponsive after a suspected overdose. Respiratory rate is 8 breaths per minute.
Head positioning briefly improves airflow, but obstruction returns when jaw support is released.
There is no gag reflex.
A correctly sized OPA is inserted and assisted ventilation begins.
Chest rise improves and oxygen saturation increases.
Learning point
Loss of tone with absent airway reflexes is a classic indication for OPA use.
Paediatric OPA Insertion
In paediatric patients the rotation technique should not be used.
Rotation can damage the soft palate.
A teaching aid we use to help learners remember is the rhyme:
“Under 8 goes in straight”
Instead:
Insert the airway the correct way up from the start
Use a tongue depressor if required
Advance gently without rotation
When an OPA Is Not Enough
If obstruction persists despite:
Positioning
Postural drainage
Suction
Correct OPA placement
Further escalation is required.
Airway management follows a ladder of interventions.
An OPA is a basic airway adjunct, not a definitive airway.
Depending on the situation, other airway adjuncts such as nasopharyngeal airways (NPAs) or more advanced airway management may be required.
OPA as a Core FREC 3 Airway Skill
On a FREC 3 course, airway management is not taught as a checklist.
It is taught as structured thinking.
Position first.
Assess airway reflexes.
Insert an adjunct if indicated.
Reassess continuously.
Correct OPA use sits at the centre of this.
At FREC 4 level, training expands into ventilation strategies and more advanced airway management.
But the foundation is built at FREC 3.
An OPA is a simple device.
The judgement behind it is a core pre-hospital skill.
Frequently Asked Questions About Oropharyngeal Airways (OPA)
-
An oropharyngeal airway (OPA), sometimes called a Guedel airway, is a curved plastic device inserted through the mouth to help keep a patient's airway open.
It sits in the oropharynx, the space behind the tongue, and works by preventing the tongue from collapsing backwards and blocking airflow.
OPAs are commonly used in unconscious patients who cannot maintain their own airway.
-
An OPA may be used when a patient:
Has reduced consciousness
Cannot maintain their airway
Has absent or significantly reduced airway reflexes
Has airway obstruction caused by the tongue
Requires assisted ventilation
Is in cardiac arrest
Correct patient assessment is essential before inserting any airway adjunct.
-
An OPA should not be used if a patient has intact airway reflexes.
Signs of intact reflexes include:
Gagging
Retching
Strong coughing
Resistance to airway insertion
Inserting an OPA in these situations may cause vomiting or aspiration.
-
A contraindication is a situation where a treatment or medical intervention should not be used because it could cause harm.
For OPAs, the main contraindication is the presence of airway reflexes.
-
An OPA is sized by measuring vertically from the angle of the jaw to the incisors.
If the airway is too small, it may push the tongue backwards and worsen obstruction.
If it is too large, it may press against airway structures and cause trauma.
Correct sizing is essential for safe airway management.
-
This is a simple memory aid used in training to describe adult OPA insertion.
Invert – insert the airway upside down
Insert – advance past the tongue
Rotate – turn the airway 180 degrees
Locate – position the flange against the lips
This technique helps guide the airway over the tongue without pushing it backwards.
References
This article is primarily informed by Ambulance Care Practice (2nd ed.) and aligned with current UK pre-hospital training standards.
Ambulance Care Practice (2019). Class Professional Publishing.
Resuscitation Council UK (2025). Adult Life Support Guidelines.
Qualsafe Awards. First Response Emergency Care (FREC 3) Qualification Specification.